


I had to join in this week’s Fix-It Friday over at i heart faces because a RAW version of the photo was provided and man, do I heart RAW!! In fact, that is primarily what I shoot in at all times these days because it can be so forgiving and you can do most of your editing in Adobe Camera Raw without compromising the quality of your photo.
Here is the original from this week:
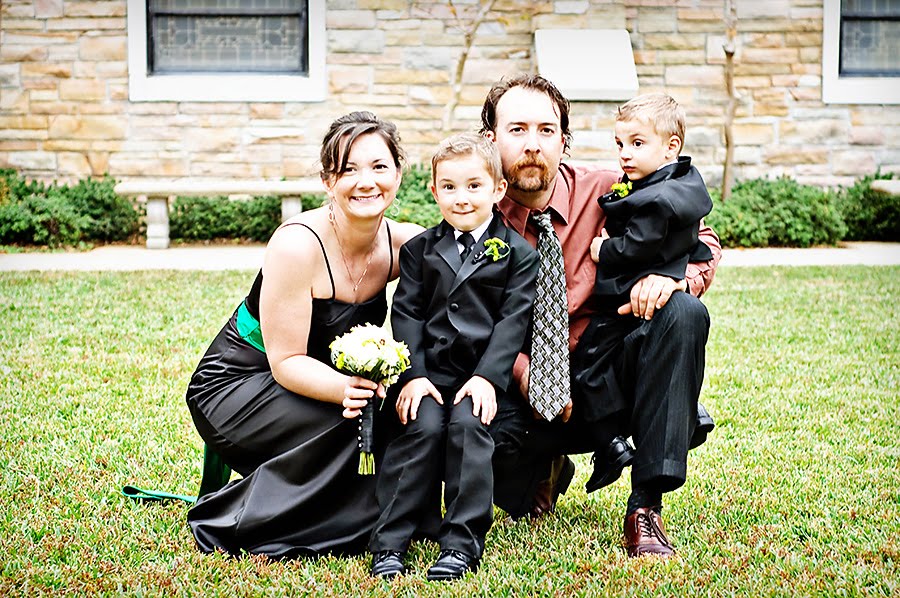
And here is my fix:
The original has a bit of a blue tint and is underexposed. So I opened it in ACR and went to town. I have learned to work so quickly and methodically in ACR, that I completely forgot to write down my steps; but here is the gist of it: I white balanced, straightened and cropped. I upped the exposure, the blacks, the brightness, the contrast the clarity, vibrance and saturation. I went into the details portion of ACR (it is the little button that has the two overlapping triangles) and upped the making the luminance and the color to get rid of some of the noise.
Now it was time to open it up in Photoshop for a few last touches.
It still was not bright enough for me, so I created a new brightness/contrast layer and upped the brightness to 71 and the contrast to 3.
Next I wanted to add a little texture, so I went to Flickr, found what I was looking for here, downloaded it and opened it in Photoshop. I then flipped it all around until I had the dark side on the left, then placed it on top of my photo. I didn’t want the red splotches in the photo, so I increased the texture size until those portions were hanging off of the photo.
I chose to use the Texture as an Overlay with the opacity set at 70%. Next I created a layer mask and used a soft round brush set at 66% opacity and 30% flow and went over just her face and hair.
Next, I ran PW’s Boost action at 25% and then flattened image.
Lastly, I ran the Coffee Shop Perfect Portrait action which opens it’s own levels window where I bumped the left arrow in to 6 and the right arrow in to 250. Then all of these different layers open so that you can adjust according to taste:
- Sharpen – 40%
- Brighten – 20%
- Turn off vivid color
- Color Pop – 10%
- Urban grit – ran a soft brush over everything but the girl and set the opacity to 25%
- Turned off whiten teeth
- Turned off whiten whites
- Eye define – used soft brush set at 30% opacity
- Bright eyes – used soft brush set at 50% opacity
- Soft Skin – still a little bit of noise, so used a soft brush opacity at 35%
- Dodge and Burn – used a soft black brush on left side of photo and set the opacity to 30%
- Vignette – set opacity to 75%
Flatten image, save and you are done!!


6 comments:
What? You rock - and that's a lot of steps - but you're such a pro i bet it took you no time at all!
I'm usually not a big fan of textures but I really liked how yours didn't detract from the subject (the girl) at all. In fact, it added to the photo. Excellent tweaking to make her face and 'presence' standout.
That is pretty sweet! I love the crop and the closeness of the subject now. Before it was very far away so it really captures her simplicity!!! Awesome JOB!
Holy wow. You are so great : )
That is a lovely edit :D Love the colours and the closeness.
You're really good a post processing!
Btw, thank you so much for the blog love :)
Post a Comment